 Who remembers that song about the lady who ate all the weird animals? How did it go? There was an old lady who swallowed a fly, I don’t know why she swallowed the fly, perhaps she’ll die! There was an old lady who swallowed a spider, it wiggled and jiggled and squiggled inside her! She swallowed the spider to swallow the fly, perhaps she’ll die! There was an old lady who swallowed a bird, how absurd to swallow a bird! She swallowed the bird to swallow the spider to swallow the fly, perhaps she’ll die! The song went on until the lady explodes or burps letting the animals all out! I found myself humming this song the other day (I don’t know why either or how I remembered it) and thought why not have the kids eat silly gross things for lunch?!
Monday, October 31, 2011
There was a little kid who swallowed a spider!
Who remembers that song about the lady who ate all the weird animals? How did it go? There was an old lady who swallowed a fly, I don’t know why she swallowed the fly, perhaps she’ll die! There was an old lady who swallowed a spider, it wiggled and jiggled and squiggled inside her! She swallowed the spider to swallow the fly, perhaps she’ll die! There was an old lady who swallowed a bird, how absurd to swallow a bird! She swallowed the bird to swallow the spider to swallow the fly, perhaps she’ll die! The song went on until the lady explodes or burps letting the animals all out! I found myself humming this song the other day (I don’t know why either or how I remembered it) and thought why not have the kids eat silly gross things for lunch?! Sunday, October 30, 2011
Natarajasana
Lord of the Dance or Dancers Pose
 Each week, 2-3 days, we do a 15 minute yoga work out in my home daycare. Kids from 1 1/2 to 4 do this and each does as much as they are able and in a way they are capable of giving them all get a nice stretch, a scheduled work out time, and some fun new body movements. We do the sun salutations and then add a few jumps, hops, new yoga pose, and teacher assisted summersaults at the end. In doing these poses always consult a doctor first, only attempt what is in your child’s ability level, and do what is comfortable for your and their body. These are only suggestions and like any exercise you and your children try them at your own risk.
 Each week, 2-3 days, we do a 15 minute yoga work out in my home daycare. Kids from 1 1/2 to 4 do this and each does as much as they are able and in a way they are capable of giving them all get a nice stretch, a scheduled work out time, and some fun new body movements. We do the sun salutations and then add a few jumps, hops, new yoga pose, and teacher assisted summersaults at the end. In doing these poses always consult a doctor first, only attempt what is in your child’s ability level, and do what is comfortable for your and their body. These are only suggestions and like any exercise you and your children try them at your own risk.
Liebster Blog Award!!!! My first is from CuteCoconut!
 I just found out that Cute Coconut has awarded me with my very first Liebster Blog Award. This is surely a blessing and a great honor to be considered up and coming in the blogger world!
In case you are not aware, this award spotlights the up and coming blogs that have less than 200 followers. So what’s the catch for this award?
By accepting this award what we need to do is:
1. Copy and paste the award on our blog.
2. Thank the giver and link back to the blogger who gave it to us. (thanks Cute Coconut!….the link is below or on her name or blog name in this blog post)
3. Reveal our top 5 picks and let them know by leaving a comment on their blog.
4. Hope that our followers will spread the love to other bloggers
Saturday, October 29, 2011
Spooky Walkway Lanterns!
 Looking for an easy and quick way to spook up your place? Add some light on the subject and show trick-or-treaters' the way to your haunted house with this craft! (Warning lately my daughter seems to have a hard time doing any craft without first painting herself! The pictures reflect this new habit.)
 You need:
Empty and rinsed Milk Jugs
White Paint
Orange Paint
Black Paint
Scissors
LED pumpkin lights
Rocks
First, clean out your milk just and let them dry. Now, let the kids’ paint them either white or Orange. Allow the jugs to dry. Once dry, cut off the tops of the jugs. Paint on a face to the front (non-handle) side of your jugs. Let this dry. Put the jugs along your walkway with rocks in the bottom so they don’t fly away. Add the LED pumpkin light (no candles, we don’t want fires!). Let the ghosts and jack-o-lanterns show the trick-or-treaters' the way to your haunted house!
Friday, October 28, 2011
How to get your wings!
Is your little one in need of wings? Whatever they choose to be, sometimes, wings are just a must! Instead of spending an arm and a leg on wings, make your own!
You need:
Two hangers
Fabric or tulle
Felt
Elastic
Packing tape
Needle and thread
Start by bending the hook part of your hanger to create a 90 degree angle. Pull the hanger out of its normal triangle into an oval or circle. If your able to and have the time to work the metal, shape it into the wing shape you desire, if not a circle/oval makes a great wing.

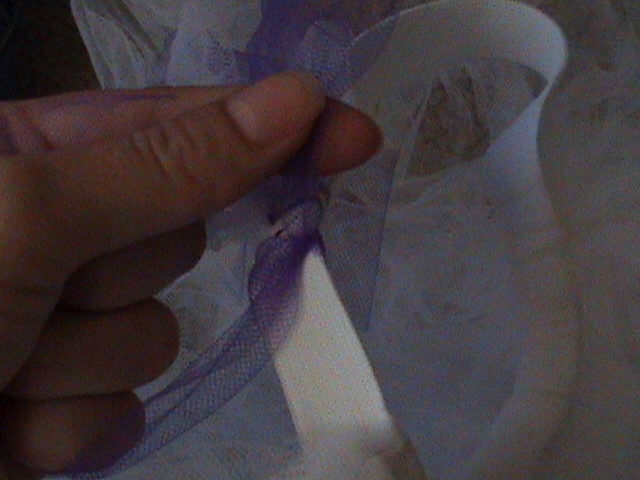
Next, Take your fabric or tulle and measure the length you will need to cover the wing add 6 inches to the length and width you find the wings to be. Fold the fabric in half with the oval part of the hanger in the middle of the fold between either sides of fabric. Pull the fabric down and tie the loose ends into knots. Stitch any openings and the knots so the fabric will stay on the hangers. Do this for both hangers.


Next, place the two hook portions together so the wings face the same direction and tape the hooks together. Wrap the hooks now covered in tape in felt and sew the ends to itself. Measure the elastic to go around each shoulder of the child adding 2 inches. Cut two pieces of Elastic. Fold the elastic in half.

Put the felt covered hooks inside the fold of the elastic, pull taut, and stitch the elastic closed, stitch the elastic to the felt so the two ends of the elastic face away from the wings. Now stitch the open ends to each other to create the arm holes. Once, both arm hole has been created decorate your wings. Sew on patches, glue on jewels, paint a design, sew on buttons, or stitch on shapes cut out of felt!
If you have a little bug and need antennae, take a headband and wrap a pipe cleaner around it leaving some of the pipe cleaner to stick up straight. Bend or curl the ends of the pipe cleaner to help your look or add painted or fabric covered Styrofoam balls on the end to finish your antennae look! Hot glue the pipe cleaner to the headband for added security.
Be careful that your little one doesn’t fly away with this costume! Remember to be careful while trick or treating!
Abby
You need:
Two hangers
Fabric or tulle
Felt
Elastic
Packing tape
Needle and thread
Start by bending the hook part of your hanger to create a 90 degree angle. Pull the hanger out of its normal triangle into an oval or circle. If your able to and have the time to work the metal, shape it into the wing shape you desire, if not a circle/oval makes a great wing.

Next, Take your fabric or tulle and measure the length you will need to cover the wing add 6 inches to the length and width you find the wings to be. Fold the fabric in half with the oval part of the hanger in the middle of the fold between either sides of fabric. Pull the fabric down and tie the loose ends into knots. Stitch any openings and the knots so the fabric will stay on the hangers. Do this for both hangers.


Next, place the two hook portions together so the wings face the same direction and tape the hooks together. Wrap the hooks now covered in tape in felt and sew the ends to itself. Measure the elastic to go around each shoulder of the child adding 2 inches. Cut two pieces of Elastic. Fold the elastic in half.

Put the felt covered hooks inside the fold of the elastic, pull taut, and stitch the elastic closed, stitch the elastic to the felt so the two ends of the elastic face away from the wings. Now stitch the open ends to each other to create the arm holes. Once, both arm hole has been created decorate your wings. Sew on patches, glue on jewels, paint a design, sew on buttons, or stitch on shapes cut out of felt!
If you have a little bug and need antennae, take a headband and wrap a pipe cleaner around it leaving some of the pipe cleaner to stick up straight. Bend or curl the ends of the pipe cleaner to help your look or add painted or fabric covered Styrofoam balls on the end to finish your antennae look! Hot glue the pipe cleaner to the headband for added security.
Be careful that your little one doesn’t fly away with this costume! Remember to be careful while trick or treating!
Abby
Thursday, October 27, 2011
Fairies, brides, and ballerina's Oh My! A mom's guide to making a tutu!
We all want our little girls to look adorable for Halloween! They walk around in fairy tales and naturally want to be in one for Halloween! To help along their desires while making them a one-of-a-kind costume!
You need:
6 yards of Tulle
Glue gun
Jewels
Buttons
Patches
Elastic or ribbon
There are a few ways to make this Tutu! You can use the Elastic waist two ways or you can use the ribbon method.


First decide what you want to use.
For the First Elastic Waist method, start by measuring the child’s waist Sew the Elastic to itself to fit the child’s waist.

Now cut the tulle into strips either 3 inches or 5 inches in width. Decide how long you want the tutu to be, double this and cut the strips of tulles’ width down to this length. Loop the tulle strips around the elastic piece by piece and tie on. The elastic should hit the center of the two ends of tulle that get tied together. Once you fill the elastic with all the tulle trim the tulle as needed for the proper length. Now, you’re ready to decorate your tutu if you are so inclined.


The second Elastic Waist method is to start by measuring the child’s waist. Decide how long you want the tutu to be, double it, and cut the width of the tulle to that length. Measure how wide your elastic is and add 1 cm. Fold the tulle in half and at the fold measure down to the width of your elastic plus the one centimeter. Sew along the fold at that measurement the entire length of the folded tulle. Slide the elastic threw this hole at the fold. Using a safety pin to attach one end of the elastic to something bunch the tulle as you go. Once all the tulle is on the elastic then sew the ends of the elastic to itself. Now stitch the ends of the tulle together around the elastic and all the way down to the bottom of the tutu. Your tutu is now ready to decorate! (I ran out of tulle so I don't have pictures to show of this method, apologies)
The Ribbon method is simple. Start by measuring the child’s waist with the ribbon and add 6 inches on each end, cut the ribbon to that length. Again, decide how long you want the skirt to be and double it. Cut the tulle down to that length. Fold the tulle in half. Along the un-attached ends, keeping them together thread the ribbon threw the tulle, bunching the tulle as you go! Once all the tulle is on the ribbon measure the child’s waist again and tie a double knot on each end of the ribbon to keep the tulle from sliding off. Now you’re ready to decorate!


Whichever methods you choose make sure to measure the child’s waist for comfort to avoid anything from being too tight or too loose! Now is the time to decorate! You can hot glue on some jewels, sew on some patches, or tie on some buttons (double knot to avoid losing your buttons)! Decorate the tutu to fit the costume! Make tutu’s for a little lady bug or a witch or even a scary ghost all in white!


If you have a blushing bride then you can also make a half veil to wear on the head! Using the elastic tie method of your choice, instead of tying the tulle all the way around, just tie it 1/3 of the way around and wear like a headband!


Whatever your little lady chooses to be, make sure she has a one of a kind, made just for her design! Make some for dress up play or to go under another costume’s skirt for added poof! Have fun making this and always take lots of pictures because there may come a day when it won’t be cool for mommy or daddy to make a costume!
Abby
Alexa Blog Hop!

VERY IMPORTANT PLEASE READ BEFORE JOINING
EVERY WONDER WHY YOUR BLOG ISN"T RANKING LIKE OTHERS?
Make Your Rank Lower With our 4 day Alexa blog hop hosted by Mom Blog Society, Mom Does Reviews and One Moment In Time..
.
■Alexa ratings are based on how many people, with the Alexa Toolbar installed, (it takes less than 5 minutes to get it installed) visit your blog, how much time they spend there and how many pages they look at while there. The more the better.
■If you're looking for advertising sponsors on your blog, chances are they are going to look up your Alexa rating. The lower the better.
■One of the NUMBER 1 things to get your Alexa rank down is ALEXA REVIEWS.
■Follow Them either via GFC, FB, or Twitter.
■Leave them a COMMENT SO THEY CAN RETURN THE FAVOR TO YOU!
1.If you can't do all of the the linkup, do a few.
2.Let them know with a comment!
3.Spend a few minutes on the blog
4.View some pages on their blog
5.Click the stars or notepad in your Alexa toolbar and leave them a review.
6.They will return the favor.
Wednesday, October 26, 2011


Tuesday, October 25, 2011
Blog Growth!
I've made some updates to the old blog here!
I started a savings page with links to contests, coupons, deals, and free stuff! Check it out if you're looking for a way to save that extra dollar!
For the fur lovers out there! I've also started a page all about the furbabies/dogs! I'll post deals for pets as I find them at the bottom of the page and from time to time will add a story or picture of the other kids in my house who walk on four legs instead of two!
I now have a sponsor page for those looking to keep the crafts coming and get some extra veiwers sent their way so check that page out if your interested or to see who are my supporters. You can also purchase ad space on my blog the link for that is on the right side. Or just donate with the donate button!
Another new page is the site's I'm active. If you are a blogger looking to further your network check these sites out. If you want to support my blog just click on one of the many review sites to the left and give a great review!
In addition, I now also have a page listing the awards, honorable mentions, and where I have been featured.
Can't get enough Mommy Moments? If you want to see more stuff from me check out the page listing my guest postings for other sites/blogs.
Last, but definately not least is my button page. If your interested in other great blogs check out the button page and click on the buttons to visit other site's that I love!
This blog is growing and I love the support! I'm hoping to keep all the crafts, yoga, recipes, book reviews, deals, puppy love, opinions, and product opinions coming for your pleasure and knowledge. Thanks for visiting, come back often and soon!
Abby
Monday, October 24, 2011
Dem' Rattlin' Bones!
Halloween sounds can really make the season come to life! Why not make a cute decoration that adds to that creepy feeling of your haunted house? It doesn’t cost much, but it provides years of memories and moments of fun while you make it!
You need:
Black paint
White paint
3 nails
3 screws
String
Outdoor primer
4 tin cans (empty soda cans are alright)
1 Hammer and nail (this nail shouldn’t be one of the ones listed above)
1 wire hanger
Glue gun
Kid feet
Start by priming the cans. Due to the chemicals please do this step yourself and allow this to dry fully! Now, have the kids paint the cans black and the screws and nails white. Allow this to dry.


Once the cans are dry, paint the kids’ feet white, be careful this may tickle. Help them press a foot print on different sides of the cans with the toes toward the openings of the cans or the openings of the soda cans. Let this dry.


Next, tie a string around the nails and screws. Using the hammer and nail put two holes across from each other in the end of the can with the bottom. Thread some string threw the holes in each can.
Take the hanger and bend it into a Z shape. Bend the hook so it forms a circle/oval.


Now tie the screws and cans to the hanger using the hot glue to secure it to the hanger so they don’t bunch up.


On the cans, use a black sharpie to draw on two eye holes, 3 nasal slits, and outline the teeth/toes on your skeleton!

Look at your collection of skeleton heads and white bones and cackle as they knock together in the wind! Hang outside for a spooky looking and sounding Halloween decoration!


Talk about the different bones in the body, offer facts about bones like what they are made of, and always write down what those kids say in your Kids’ journal! Don’t be afraid to take a moment of fun to teach something, you never know when the wind will blow a piece of knowledge your way! In closing, our bodies are full of interesting things and it is never too early to dissect the different pieces of knowledge they hold!
Abby
Friday, October 21, 2011
Monster Eyes!
It’s the season to be spooky! I’m not sure if you’re like me, but I look around at the decorations and everything costs an arm and a leg (bad Halloween joke, I know). So, I did what I’m best at, I looked around at what I had in my house that I could turn into a great spooky decoration! Recently, the hubby and I went golfing, I’m really bad so half way through I had to stop off and buy more balls (I realize I’m disgracing myself as an Arizonian with that reveal, but what can you do with a slice like mine). I have a ton of left over felt and tulle scraps, paint galore, and an empty container from some foam stickers I recently got. Bing! Inspiration hit! Mainly because every time I was on the tee I felt like that little white ball was staring at me, so eyes it is!
You need:
White balls (golf, ping pong, bouncy)
Red paint (color of your choice is fine)
Green felt
White tulle
Clear container to hold balls
Black or green marker (again color of your choice is fine)
An empty egg crate
Kid’s fingers
Start by putting the balls in the egg crate, so they will dry better. Next, dip child’s finger in the paint and put a finger print on each ball. Allow to dry. Once this is dry draw on the pupils with your marker and adds squiggly lines for the eye ball veins. Allow to dry. Place the balls in your container; put the tulle on top then the green felt for the monster slime that has oozed out of the eyes. Put on the lid and Viola! One container of Monster Eyes to place in your dissection lab (evil laugh here)! Best part about this decoration, you can still take the balls out when done and use them! Bonus, for a bad golfer like me, you’ll always know which ball is yours even when you’re not sure you want too!


You can add to this by using a few different colors of balls and paint! I used a yellow golf ball and some small lemons still green that fell off my tree early this year. Label the jar or container with a label that has a spider’s web or one eyed monster on it for effect! If you don’t need the balls back you can spray with glitter spray and glow in the dark spray before putting in the jar for some glowing light catching monster eyes! Beware if you use the balls again, glitter will fly off creating a dusty sparkly trail behind it potentially blowing into your eyes. Don’t let your monster eyes hurt your eyes if you use glitter.

Halloween can be fun no matter your budget. All you need is what you have in your house, a little inspiration, the Halloween spooky spirit to guide that inspiration, and kids willing to create with you! Remember to write down pearls of wisdom or insight your kid offers in your Kids Journal! If the kids are older take this chance to talk about the different parts of the eye like the iris and how they help us to see! In closing, kids are happy spending time with you finding, creating, learning, and loving. So, don’t spend a bunch of money on decorations when you can create so much more by making your own!
Abby
Subscribe to:
Posts (Atom)
Can't get enough Mommy Moments?
Need more Mommy Moments? Check out my wedding blog! That's right, Mommy Moments is getting married! Twice!


Shopping Job
